If you are an ardent sauna fan or use one for athletic or personal reasons and love using one at every chance you have, but find it time consuming or expensive to use one very often at your local gym, spa or wellness center, then it may be worthwhile to invest in a personal sauna at home.
However, purchasing a permanent infrared sauna can be quite expensive and can cost anywhere between $2,000 and $5,000+, which is a huge investment to make, especially if you want to try out an infrared sauna for a while and check out the benefits it offers. In such a case it may be a good idea to build a DIY infrared sauna tent at home.
Reasons to Build a DIY Sauna at Home
Building a DIY infrared sauna at home can be a good idea for several reasons. The main reasons why people consider building a DIY sauna at home are if they don’t have sufficient space for a readymade sauna or are short of funds and don’t have the money for a large sauna.
Typically, a pre-made sauna will require space in your home according to its dimensions. And, if you don’t have sufficient space for a readymade sauna, then it is best to build a customized sauna according to the space that is available in your home, whether in your master bedroom, gym, basement, patio or in the yard.
Another key reason why you may prefer a custom-built DIY infrared sauna is the budget. There are plenty of manufacturers, types and brands of saunas on the market; however, purchasing a readymade sauna can be an expensive proposition and can cost over $2,000 for the most basic model and the cost just increases with the size and features of the sauna.
If you are suffering from health issues or are not quite convinced about using an infrared sauna and the benefits it may offer or you’re not quite ready to spend upwards of $5,000 for a stand-up wooden sauna and would like to test out an inexpensive version at first, then building a DIY infrared sauna is a great idea.
You can build a DIY sauna well within your budget. You can easily buy the various components required for the sauna from your local store or get great deals online. Also, since you will be building the sauna yourself, you will not be paying anything in terms of the labor cost. In short, you can build a DIY sauna for less than $250, which is a steal.
Another reason why you may not want to invest in a large and expensive infrared sauna is if you are living in a rented home or one that is not your permanent home. You are worried that you may have to move to a new house in the future and the sauna that you have invested in will not fit in your new home.
Or, if you are living in a rented apartment or condominium where the landlord will not allow any modifications and will not allow you to hire an electrician to install any wiring to set up a large sauna. In such cases, an inexpensive DIY sauna is the best option.
And, you can stick to a DIY sauna until you answer some of the following questions i.e.,
- Is an infrared sauna something you enjoy?
- Is it something that you will use every day?
- Can you see any benefits from regular sauna usage?
Going the DIY sauna building route is an extremely affordable option that will give you the chance to test out how you react to regular sauna usage and in general, infrared saunas.
How to Build a DIY Near-Infrared Sauna?
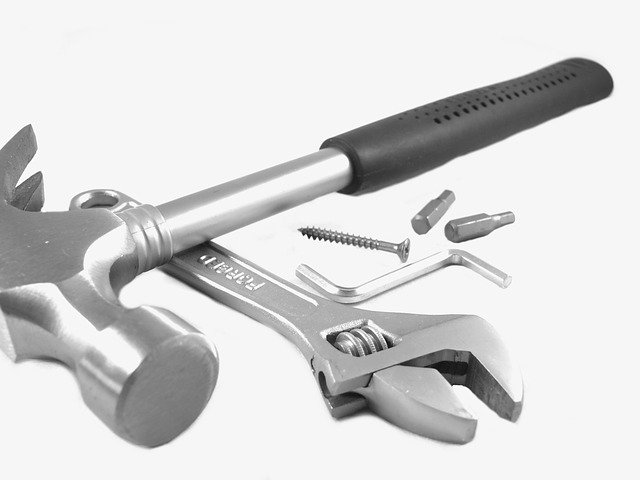
As you can see, there are plenty of advantages of building a DIY near-infrared sauna instead of purchasing a pre-made model for your home. However, you may hesitate to begin the DIY project for lack of know-how of how to build a near-infrared sauna or you don’t have the appropriate tools or parts for the same.
If you do an internet search of “how to build a near-infrared sauna?”, you are sure to get plenty of articles and blog posts that may tell you what parts you must get to build a near-infrared sauna; however, they may not be sufficiently detailed to give you a step-by-step instruction guide of how to assemble the infrared sauna and what you should use or how to use it to make the near-infrared sauna more effective.
And, this is where we can help. Our “DIY Infrared Sauna Guide” is a detailed, step-by-step certified online course that will teach you how to build your own DIY portable and inexpensive near-infrared sauna tent. You can buy the course and learn to build your own near-infrared sauna quickly for under $200.
The DIY sauna tent that you build will heat you up efficiently and provide all the benefits, including effective detoxification like the larger and more expensive sauna models.
At the end of the course, you will have your own, very affordable, personal near-infrared sauna in your home that you can use at any time you want.
Things to Consider When Building a DIY Near-Infrared Sauna Tent
Type of Enclosure
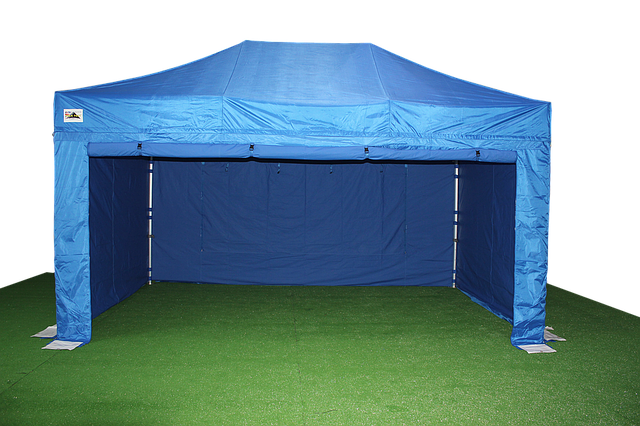
The shell or enclosure of the sauna tent is one of the key components of your DIY sauna and it really depends on you whether you want to buy a pre-made enclosure or build one yourself. While buying a pre-made enclosure is easier and quicker, these are difficult to find and you’ll have to buy a similar enclosure and make the necessary modifications. You can opt for a privacy tent that is easily available online.
This is a simple structure with a basic frame that is easy to set up and disassemble. You can either use fabric or use a better material such as foil insulation, which you can easily buy online for a more sturdy and fire-resistant enclosure.
If you have the skills, then you could consider the option of custom building an enclosure according to your preference. However, this is time consuming, costs more and takes some effort to do. However, you can tailor make it according to your requirements and add the type of seating, accessories, etc. of your choice.
The final option and the easiest is to use existing space in your home such as a small room, closet, bathtub or table with a curtain around it and convert it into a sauna. This is probably the most effortless, quickest and cheapest way to have a DIY infrared sauna ready in a jiffy.
Our sauna course covers in greater detail where you can purchase sauna enclosures or how you can modify an existing enclosure to make your DIY infrared sauna.
Heat and Light Source Options
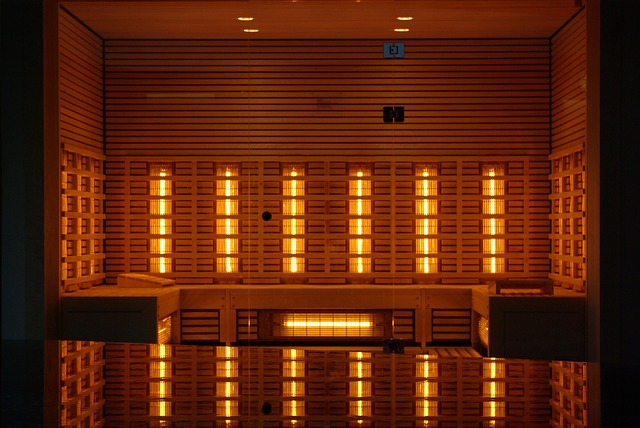
The next important thing to consider is the source of light and heat that you’re going to add to the DIY near-infrared sauna tent. You can either use an infrared bulb along with a lamp or you can opt for a lamp with single or multiple bulbs.
There are several pre-made lamps that you can purchase online or you can make your own heat lamp by purchasing the fixtures and the bulbs separately.
Making your own lamp allows you to control the angles, spacing and also custom-arrange the lights in the manner that you want. If you don’t have any constraints on your budget, then instead of making a heat lamp using bulbs, you could opt to get a sauna heater. Sauna heaters are very easy to install and usually come along with a digital controller that lets you control the heat in your DIY infrared sauna very easily.
As you can guess, the heat and light source of your DIY sauna is the most important aspect that will affect the efficiency and effectiveness of your sauna. And, our sauna course discusses all about the selection of the sauna heat and light sources in great detail.
Lamp Clamps
After you have determined what type of heat and light sources you will be using in your DIY infrared sauna tent, an important thing to consider is the type of lamp clamps that you will need to hold the sauna lamps in place properly.
The clamp that you use should not only be able to accommodate the bulb that you are using but should also be able to resist the heat that the lamp will produce.
So, it is recommended that you purchase clamps that are rated for 250-watt bulbs and have sockets made of ceramic. You can check our sauna course for more details on different options of lamp clamps for your sauna.
Sauna Accessories
After figuring out the details regarding the enclosure and heat and light source of your DIY infrared sauna, you could consider a few accessories. While this is optional, these accessories will help to increase the comfort and functionality of your sauna.
Chair/Stool/Bench

A chair or bench to sit on while using the sauna is an important accessory. The time that you spend in the sauna should be comfortable. It is important to be seated while you’re sweating in the sauna because standing up in the sauna heat for a long time can make you feel lightheaded or dizzy after a while.
So, it is a good idea to purchase an inexpensive folding/camping chair for your DIY sauna, which allows you to sit comfortably during your sauna session.
Thermometer/Hygrometer
It is extremely important to monitor the heat, as well as humidity, inside the DIY sauna. Pre-made saunas are usually equipped with digital controllers that allow you to control the heat, humidity, time and other factors of the sauna easily. However, in a DIY sauna tent equipped with a heat lamp, you don’t have a digital controller that will allow you to control the various factors.
If the sauna gets extremely hot or the humidity levels get too high, it can be dangerous. Hence, installing a thermometer to your DIY infrared sauna setup can be very helpful in monitoring the heat in the sauna.
A hygrometer is also useful in keeping a check on the humidity of the sauna. Today, there are several options of 2-in-1 thermometer/hygrometers available on the market or online, which are very reasonably priced.
Power Strip
Once you have decided on the lamps that you want to use in the infrared sauna, you will need a power strip that allows you to plug in all the bulbs so that you are surrounded by warm, soothing infrared heat. The power strip should have a surge protector to ensure that it can handle the load of all the bulbs that you plug in.
Also, make sure that the power strip that you select has a sufficiently long cord that gives you ample room to maneuver the power strip. Our online sauna course has more information about the other options for plugging in the sauna bulbs and also tips on how to make your sauna safer to use.
Eye Protection

The infrared lamps in the sauna can be quite bright and looking at them directly can harm your eyes. When you spend some time in the sauna, the infrared lights can cause strain to your eyes.
So, it is a good idea to invest in some eye protection. You need not splurge on buying some high-end, pricey goggles. A simple, inexpensive pair of bed-style tanning goggles should provide adequate protection.
MP3 Player/Radio
Sauna therapy as we all know is a great way to relax after a long, tiring day. And, you can increase the relaxation by adding some kind of entertainment to your DIY sauna. Listening to your favorite music, a podcast or an audiobook while relaxing in the sauna can add to the relaxing experience. While this is a common feature in regular readymade saunas, the question is how can this be done in a DIY infrared sauna tent?
You can bring along your phone or MP3 player, which you can connect to the speakers that can be placed outside the sauna tent and you can control it with the controller you have with you. Adding entertainment is purely optional; nevertheless, it can be a fantastic way to elevate your sauna experience.
The Difference between Near-Infrared, Far-Infrared and Full-Spectrum Saunas
Now, that you have an understanding of what are the important components that you need to build your DIY near-infrared sauna, our sauna course will give you a detailed, step-by-step guide on how to build your infrared saunas along with important tips and techniques that will help you to put together your sauna quickly and effortlessly.
However, you may have heard about the different types of infrared wavelengths and may be confused about which is the most beneficial and what is best for your DIY sauna. Well, infrared saunas come in different varieties, in terms of the wavelengths produced by them, which in turn, penetrate the tissues in our body to different depths, providing fat burning and detoxification benefits.
Our course covers all that you need to know about near-infrared saunas in depth; however, here is some information that will help you understand the different types of infrared wavelengths and their benefits in greater detail.
- Near-infrared (NIR) saunas emit near-infrared waves that penetrate the deepest into your body. NIR saunas combine both light therapy, as well as heat therapy. Near-infrared helps to boost the immune system and is excellent for detoxification and healing wounds.
- Far-infrared (FIR) saunas are equipped with heating elements that produce invisible light that does not penetrate the body as deeply as the near-infrared waves. FIR helps to lower blood pressure and also provides detoxification and relaxation benefits.
- Full-spectrum saunas emit all 3 types of wavelengths i.e. near-, mid- and far-infrared waves and you can adjust each of the wavelengths for the benefits you desire.
Pros and Cons of Building a DIY Near-Infrared Sauna

Before you decide on buying our DIY sauna course, you may want to evaluate the pros and cons of building a DIY near-infrared sauna. And, in this section, we have discussed some pros and cons that can help you make your decision.
Pros
- People generally believe that far-infrared saunas are more efficient and effective as compared to near-infrared sauna models. However, this is a misconception that is spread by sauna manufacturers trying to push their products and in reality, near-infrared saunas provide greater health benefits—they help to improve blood circulation, relief from pain and detoxification.
- If you go shopping for a far-infrared sauna, you are sure to spend anywhere in the range of $1,000 to $5,000, which is a lot of money, compared to building a DIY near-infrared sauna at home, which will cost you less than $300 from start to finish.
- A DIY sauna tent is easy to assemble and dismantle and this is especially useful if you’re living in a rented home and don’t want to invest in a proper wooden infrared sauna.
- A DIY near-infrared sauna is very easy to build. It is compact, lightweight and inexpensive. You do not need to make any modifications to your home.
- The modular structure of a DIY near-infrared sauna allows you to adjust the number of lamps/heaters and configure them according to your preference and if you feel the need for more, you can always add a few more later on.
- A DIY near-infrared sauna is customizable according to the space, number of people, requirements, etc.
- Sometimes, people may just make use of a mylar heat blanket or a sauna blanket to heat the body. However, a near-infrared sauna tent can trap the heat more effectively and ensure that your body is surrounded by the heat, making you sweat more effectively compared to any other option.
- Most of the YouTube tutorials and blogs available online offer an overview of how to build a DIY near-infrared sauna tent without going into a lot of detail. However, our DIY sauna course offers you a complete step-by-step guide of how you can build a near-infrared sauna tent in your home so that you can get one up quickly and easily.
Cons
- An important thing to keep in mind about a DIY infrared sauna is that while it is very easy to use, inexpensive to build and offers the basic advantages of an infrared sauna, it is still not an exact substitute for a low-EMF wooden sauna.
- Most DIY sauna guides show how to build a DIY sauna by attaching heat lamps or a mylar heat blanket to trap the heat. However, this is not as effective as having a proper enclosure that can make you sweat effectively. Also, when you place the near-infrared lamps on the shelf, this does not allow your body to be surrounded by uniform heat for the sauna to be effective.
- While it is quite safe to use a DIY infrared sauna, since you are building and installing the sauna on your own without the help of a professional, you must take more precautions about the safety of the sauna.
- It can be quite difficult to purchase the appropriate materials and accessories for the near-infrared sauna. You must ensure that you get the proper fabric for the sauna tent, chair, heater, etc.
In conclusion, as we have already discussed, apart from the relaxation and therapeutic benefits, infrared saunas are great for your overall health and well-being. However, when you consider readymade sauna models, they tend to be large and heavy, need special assembly and an electrician to install dedicated electricity wiring.
Not to mention that these saunas are quite expensive too. And, if you are facing space and budget constraints, then you could definitely consider the option of building your own DIY infrared sauna tent.
In our article, we have discussed some of the most important things you need to know to put together your DIY near-infrared sauna tent. However, by buying our sauna course, you can get more detailed and step-by-step instructions that will guide you to build and set up your near-infrared sauna tent quickly and easily.